Is your shower floor low in places, creating little troughs and shower floor puddles? Do you want to fix this problem but aren’t sure where to start? Good news; we have some tips that can help you fix low spots on your shower floor.
So, how do you fix low spots on the shower floor? You can replace the shower base or install new tiles on top of the existing shower floor tiles. Also, you can re-slope the shower base or chisel out the tiles in and around the low spot.
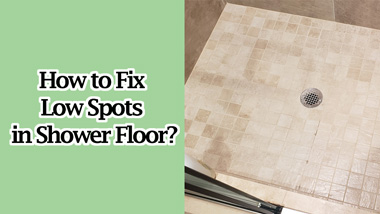
In this guide, we’ll explain how to fix low spots in your shower floor so you can avoid expensive repairs down the road. Also, we’ll discuss what causes low spots and how to identify them. Read on!
Why Are There Low Spots on Shower Floor?
There are a few reasons why low spots might form on your shower floor.
First, if you didn’t correctly level the floor before installation, the low spots may be where the floor is uneven.
Second, if you installed the floor over an existing floor, it’s possible that the old floor wasn’t level either. So, the low spots are simply carrying over.
Third, if there’s any excess tile mortar around the perimeter of the shower or between tiles near the drain, this will cause dips as well. Finally, you may have used improperly graded sand when installing your subfloor—this can lead to settling and low points.
The fix for all these problems? It depends on what they are, but usually, re-leveling the floor is sufficient to fix the problem. The key here is to identify which specific issue has caused the problem to know how best to correct it!
How to Identify Low Spots on Shower Floor?
There are a few ways of identifying low spots on your shower floor.
The first is by sight. If you see any sunken areas on your floor, chances are there is a low spot. Another way to identify low spots is by feel. Run your hand along your shower floor and see if you can feel any dips or depressions.
Also, look for pooling water that won’t go down. Additionally, if your shower floor doesn’t dry, it might be a tell-tale sign of low spots.
Finally, you can use a level. Place the level on your shower floor and see if it is level from front to back and side to side. You have a low spot if one side is lower than the other.
Once you have identified the low spots, you can begin to fix them.
How to Fix Low Spots on Shower Floor?
There’s nothing more frustrating than finding a low spot on your shower floor. Not only is it an eyesore, but it can also lead to the shower base not draining, shower floor damage, or mold buildup.
Luckily, there are a couple easy ways to fix this problem.
Fill in the low spot with a cement floor leveler
Mix the floor leveler according to the manufacturer’s instructions and pour it into the low spot. Allow the leveler to cure for the recommended time and seal with waterproofing.
Sand the area smooth with 120-grit sandpaper. Wipe away dust with a damp cloth and paint over as desired.
We recommend RedGuard for waterproofing. It not only creates a waterproof seal but also prevents cracks.
Re-tilling or re-flooring
There’s no need to tear out your old shower floor tile if you don’t want to. You can install new tiles right on top of the existing tiles.
Start by applying a layer of thin-set mortar to the old tile. Then, set the new tile in place and press it firmly into the mortar.
Use a level to ensure each tile is even. Once all the tiles are in place, apply grout between joints and wipe away excess.
You can angle the new layer towards the drain to improve the shower floor slope.
Chisel out the tiles around the low spot and re-slope
Start by removing all the grout around the tiles surrounding your low spot using a grout removal tool. Next, use a hammer and chisel to chisel out the tiles.
Once you have broken out all of the tile surrounding your low spot, chip away at your subfloor. Do so until it is level with the bottom edges of your tile, which are now exposed.
Be careful when chipping out tiles. Otherwise, you might puncture the waterproof liner underneath.
Once this has been done, fill in the area of your low spot with thin-set mortar and re-slope to avoid leaving the shower floor too flat. Then apply new tiles to cover it.
Replace the shower base
Replacing the shower base can be a difficult and time-consuming process. Also, it can be pretty expensive.
However, it’s worth it if you want to keep your shower floor looking its best. It ensures that the new base is level and even with the rest of the shower. Also, this is the best time to rectify things if you originally had a no slope shower floor.
Removing the old shower base may require demolition work, so be prepared for a little mess. You’ll have to remove all the tiles, wet bed, and waterproof membrane.
Then, re-tile the entire shower area, so the new base is level with the rest of the shower floor. Re-caulk or add silicone sealant around the perimeter of the shower base.
Replacing the shower base to fix a shower floor with low spots should only be the last resort. It’s expensive and will more likely require professional service.
What Happens If Water Gets On The Shower Floor Tile?
Do you know what happens if water gets on the shower floor tile? You might be surprised to learn that it can cause serious damage.
It can tear up the drywall or cause the tiles to fall off. Also, it can seep down, damaging the ceiling on the floor below.
Worse still, it can cause mold or mildew to grow. This can ruin the look of your tile and be dangerous for your health.
Therefore, if you notice any low spots on your shower floor, fix them as soon as possible.
Conclusion
So, after reading this article, you hopefully understand how to fix low spots on a shower floor. We’ve covered everything from identifying low spots, what causes them, and how to fix them.
If the problem is negligible, use a squeegee to remove excess water. If not, you’ll have to rebuild or repair your shower floor.
Some methods are simple enough to make it your DIY project. However, if you’re uncomfortable doing any of those things, seek professional help! Depending on the severity, this might be the best option.
Further Read:
Bath and sink connected on same pipe: Details Guide
Things You Should Know about Air Admittance Valves