Discovering a leak in your water heater is a matter of serious concern. It can lead to potential damage and inconvenience in your home. You need to fix the issue before it’s too late.
So, what do I do if my hot water heater is leaking from the top? The first thing you need to do is turn off the heater’s power and water supply. Then visibly inspect the heater. If you find any crack, leak, corrosion, or loose fitting connection, you need to fix it or replace it.
However, how will you fix the issue if you don’t know the reason behind the leak? So, let’s dive deeper into the water heater leaking problem.
What Do I Do If My Hot Water Heater Is Leaking From the Top: A Quick Glance
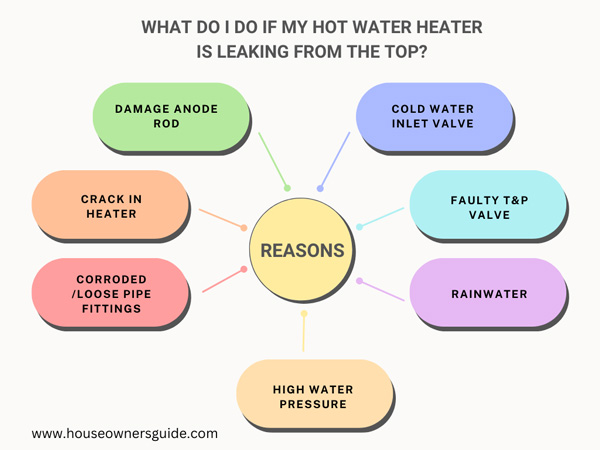
What you should do depends on the reason behind the problem. There are several potential reasons for water heater leaks. Here are some common ones:
| Reason | Solution |
| Cold water inlet valve | Replace or tighten the inlet valve |
| Faulty T&P valve | Replace the valve |
| Rainwater | Properly cover the heater |
| High water pressure | Install a T&P valve |
| Corroded /loose pipe fittings | Tight the loose pipe and replace the corroded pipe |
| Crack in heater | Replace the heater |
| Damage anode rod | Replace the rod |
What Do I Do If My Hot Water Heater is Leaking from the Top: Reasons and Solutions in Depth
If your hot water heater is leaking from the top, there are 7 steps you can take to address the issue after identifying the causes. Here are the causes and solutions in detail.
1. Cold Water Inlet Valve
The cold water inlet valve is the entry point for cold water from the main water line into your water heater. If this valve becomes damaged or worn out, it can lead to leaks.
Solution
Check if it’s properly tightened or if there are any leaks around the valve. Tighten or replace the valve if necessary. Follow these steps to replace the inlet valve:
Step 1: Turn off the power
Step 2: Drain the tank
Step 3: Now shut off the T&P valve
Step 4: Remove the old inlet valve by using the channel lock plier
Step 5: Install the new one and tighten it with a wrench
2. Corroded/Loose Pipe Fittings
Over time, pipe fittings can corrode or become loose, leading to water leaks. Corrosion can be accelerated by factors such as high mineral content in the water.
Solution
Check if any pipe fittings connected to the top of the heater are loose or corroded. Tighten any loose fittings; if you notice corrosion, you may need to replace the affected parts.
Here is how to do it:
Step 1: Drain out some hot water from the heater
Step 2: Turn off the cold water line and turn on all the hot water faucets in the house
Step 3: Disconnect the corroded fittings from the heater using a pipe wrench
Step 4: Wrap Teflon tape on the threads of the new pipe
Step 5: Insert the new pipe into the water heater tank and tighten it clockwise
3. Faulty T&P Valve
The temperature and pressure (T&P) relief valve is a safety feature on water heaters. If the T&P valve malfunctions, it may cause leaks by releasing excess pressure or overheating water.
Solution
Unscrew the old valve by using a pipe wrench. Apply Teflon tape to the new valve’s threads and securely screw it in.
4. Rainwater
If the water heater is in an area exposed to rain, water might enter through the top and create a leak.
Solution
Ensure the heater is properly covered or shielded from rain to prevent water from seeping into the unit.
5. High Water Pressure
Excessively high water pressure can strain the water heater, leading to leaks.
Solution
Consider installing a pressure-reducing valve (PRV) to regulate the water pressure and protect the heater’s integrity. Here’s how to install PRV:
Step 1: Shut off the water supply
Step 2: Drain the water heater
Step 3: Determine the installation location
Step 4: Use a pipe cutter or hacksaw to cut the pipe at the marked location
Step 5: Apply Teflon tape or pipe thread sealant to the threads of the pressure-reducing valve
Step 6: Connect the valve to the pipe’s cut ends, ensuring it is oriented in the correct direction
Step 7: Use a pipe or adjustable wrench to tighten the connections securely
6. Crack in Heater
A crack in the tank or a water heater component can cause leaks.
Solution
Check the heater for visible cracks or signs of damage. If you identify a crack, replacing the entire water heater is advisable.
Here’s how to do it:
Step 1: Turn off the water supply and electric power
Step 2: Drain the water using a garden hose
Step 3: Detach both cold and hot water lines
Step 4: Disconnect the heaters vent pipe
Step 5: Carefully remove the old water heater from its location
Step 6: Connect the pipes and fittings of the new heater
Step 7: Connect the hot and cold water supply lines
Step 8: Turn off the power and test the new water heater
7. Damage Anode Rod
The anode rod is a sacrificial component that prevents rust and corrosion. Over time, the anode rod can become worn out or completely deteriorate, leading to leaks.
Solution
If the anode rod needs replacement, purchase a new one. However, if it’s still in good condition, clean it using a wire brush or vinegar solution. Check this video before starting the process –
When to Seek Professional Assistance
If you’ve experience with plumbing repairs and feel confident in your abilities, you can attempt some troubleshooting steps. However, consulting a professional is wise if you’re unsure or inexperienced.
Attempting complex repairs without the necessary expertise could lead to more damage or pose safety risks.
Tips for Regular Maintenance to Prevent Future Leaks
Regular maintenance is crucial for preventing future leaks in your water heater. Here are some tips to help you maintain your water heater and avoid leaks:
Install a Leak Detector
Consider installing a water leak detector near your water heater. These devices can detect leaks early on and alert you, allowing you to address the issue promptly.
Test the Thermostat
Periodically check and test the thermostat on your water heater. Ensure it’s set at an appropriate temperature (usually 120℉-140 ℉).
Change the Anode Rod Regularly
The rod deteriorates and should be replaced periodically (typically every 2-3 years). Changing the anode rod helps extend the lifespan of your water heater and reduces the risk of leaks.
Check the Pipe Connections
Inspect the pipe connections on your water heater regularly. Tighten any loose connections and repair or replace damaged pipes or fittings as necessary.
Schedule Professional Inspections
Consider having a professional plumber inspect your water heater regularly. They can identify any issues and offer recommendations to extend the lifespan of your water heater.
FAQs
In this section, we’ll answer some frequently asked questions about water heater leaks.
Yes, a leaking water heater could burst if the pressure inside the tank becomes too high. The leaking water can cause pressure buildup, leading to an explosion or rupture of the tank.
No, it’s not safe to use a leaking water heater. Leaks can indicate issues such as corrosion or a faulty pressure relief valve. These can lead to more serious problems like flooding and electrical hazards.
Yes, you should turn off the water heater if it’s leaking. A leaking water heater can cause further damage and potentially lead to electrical issues.
Final Verdict
So, what do I do if my hot water heater is leaking from the top? Let’s recap one more time –
- Replace or tighten the inlet valve
- Properly cover the heater
- Install a T&P valve
- Replace the rod
- Tight the loose pipe and replace the corroded pipe
- Replace the heater
Safety should always be a priority when dealing with a leaking hot water heater. If you need help with how to proceed or if the leak is severe, it’s advisable to seek professional help.